
So here's a DIY that's as easy as one-two-three... four.
This idea came about from seeing 45 seconds of the show Cougar Town one night. One of the girls had on a pink slouchy T-shirt with basically this pattern of military design on it. I've had this green shirt that's a bit too tight, and this seemed like a good update and a way to mask the too-tightness.
So here's what you'll need:


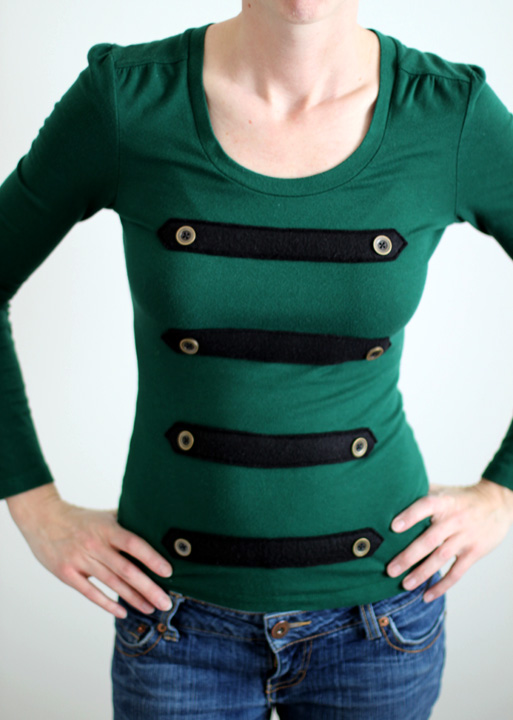
Cut 4 equally sized strips of your fleece/flannel/felt. (I recommend creating a simple pattern for yourself using wax or parchment paper. Or wrapping paper. Or anything.)

Put on your shirt and decide where you want your top strip and bottom strip to sit. Loosly pin those two on and carefully remove the shirt (and put on another one). Lay the shirt flat and now adjust your top and bottom strips so they are level, and pin in place. Evenly space the middle 2 strips and pin in place.

Step 3. Sew.
With strips in place, sew them onto the t-shirt, stitching around the outside edges.

Step 4. Buttons.
With a needle and thread, sew on your buttons, one at each end of each strip.


1 comment:
I absolutely love your shirt creation!!!! I'm goin out and getting supplies now!!!
Post a Comment