Showing posts with label holiday. Show all posts
Thursday, March 28, 2013
45 Non-Candy Easter Treats for Lil' Kids
When it comes to candy filled holidays I try to minimize the sugar levels and make up for it with other things that excite my children as well. My kids are only 1 and 3 and I hate to fill their unconditioned minds with candy. Of course I can't skip the candy completely (my husband would die, plus I'm okay with it on holidays), but at least this way the sugar rush can be minimized. Here are some ideas that I've come up with to avoid the intense sugar saturation. Not all the foods are healthy, but at least they are less sugary or vitamin fortified. And most of these are things my kids don't normally get, so anything new is exciting.
1. cartoon Band-Aids (my daughter needlessly goes through about one a day, so she'll love having her very own box!)
2. beef jerky (mini pouch or fill a plastic egg)
3. single serve popcorn bag
4. Horizon Organic chocolate milk or strawberry milk (single serving box) OR Carnation Instant Breakfast
5. Bunny Grahams (Annie's brand--perfect for Easter! fill plastic eggs)
6. Annie's Bunny Macaroni and Cheese (I never get mac & cheese for my kids, so this is a treat)
7. kid nail polish
8. chapstick or lip gloss (both my boy and girl love these)
9. dried fruit (dried cranberries are our favorite--put them in a plastic egg)
10. fresh fruit (blueberries are perfect in a plastic egg and my kids love them)
11. snack size chips
12. yogurt dipped granola bar
13. single serve Nutella and dipping sticks (I just saw these at the grocery store, so cute)
14. single serve crackers and cheese
15. mini hand sanitizer (they love to put it on, and it's good for everyone!)
16. bunny socks (the last 2 years Target has had them in the dollar bins)
17. bow-tie or necktie (also Target dollar bin this year)
18. hair clips or accessories
19. a new hair brush
20. juice box
21. Yakult (this is a probiotic drink in the yogurt section of your store, my kids beg for it every week)
22. cherry tomatoes (in a plastic egg, of course)
23. fruit cups (you know, the lunch pack type)
24. mini cereal box and single serve milk (a special sugar cereal treat in just their size)
25. fruit leather or fruit rope (like Cliff Kids, no added sugar I believe)
26. Go Go Squeeze apple sauce pouch (sweetened with juice)
27. markers, crayons, colored pencils
28. small notebook or drawing pad
29. coloring books or printed coloring pages (there are plenty circulating around the web)
30. watercolor paints and brush
31. silly twisty straws
32. any little toy from the $.25 machines at the grocery store
33. toy car
34. a new children's book
35. stickers
36. Annie's cheddar bunnies or Goldfish crackers
37. new cartoon covered toothbrush/toothpaste
38. red spatula or spoons (you might think I'm crazy, but every toddler I know loves to unload the serving-ware drawer in the kitchen)
39. travel size mini lotion (another thing my kids are always pulling out of my purse)
40. a pinwheel (you can make your own)
41. bubbles
42. a bath toy
43. freeze dried apples, bananas, strawberries (a box of individual pouches available at Costco)
44. sidewalk chalk
45. sunglasses
And here's a little candy trivia for you. Marshmallows (think chocolate covered mallow bunny) were originally made from the mallow plant which grew in marshes. Hence the name. I love those kinds of factoids.
Happy Easter! And don't let yourself forget the real reason for this beautiful season.
Pin It
Friday, October 26, 2012
Halloween Craft #4: Halloween Coloring Book Pages
We had a neighborhood "Fall Festival" party tonight, and we needed some activities to keep the little ones happy while the grown-ups socialized. Among other things, we had coloring. I quickly drew up these coloring pages for the kiddos and now I'm sharing them with you.
To download, click on the image and then right click and select Save As.
Happy Halloween!
Pin It
To download, click on the image and then right click and select Save As.
Happy Halloween!
Pin It
Wednesday, October 17, 2012
Halloween Craft #3: Tweed and Flannel Fabric Pumpkins
I had this idea last year but never got around to executing it. I'm glad I got to this year. I'm sure I got the idea of fabric pumpkins from somewhere else, maybe Martha? Who knows, but anyway, I thought some menswear would be the perfect touch for the season. A little dark, a little sophisticated, a little mysterious.
If you'd like some directions, this is a great tutorial.
Pin It
If you'd like some directions, this is a great tutorial.
Pin It
Saturday, October 1, 2011
Halloween Costume Collection
Welcome to October! I love Halloween. I think the biggest reason I love it is because of the creativity that it unleashes in people. The costumes, the pumpkin carvings, the decor, the food... everything gets a dose of fun. So to kick off the month, I thought I'd share with you a few of my costumes from past years (all home-made).
First, easiest costume ever. White clothes with black electrical tape. Add a cardboard head, and done.
This was last year, celebrating UP!
This you've seen. Ava's peacock costume.
Years ago some friends and I were the alien guys from Toy Story (I've also been Jessie, but have no photos).
And since I obviously have a tendency toward Pixar film characters, let's end with Elastagirl, AKA Mrs. Incredible.
I get my love of costuming from my mother, who always made costumes for her 6 kids (though some of us sometimes got hand-me-downs) Pin It
First, easiest costume ever. White clothes with black electrical tape. Add a cardboard head, and done.
This was last year, celebrating UP!
This you've seen. Ava's peacock costume.
Years ago some friends and I were the alien guys from Toy Story (I've also been Jessie, but have no photos).
And since I obviously have a tendency toward Pixar film characters, let's end with Elastagirl, AKA Mrs. Incredible.
I get my love of costuming from my mother, who always made costumes for her 6 kids (though some of us sometimes got hand-me-downs) Pin It
Tuesday, August 2, 2011
Peacock Costume How-To
I'm posting this in response to numerous requests for instructions on how to make the peacock costume I made for Ava last year for Halloween. I know a lot of you want to get a head start on the costume making, so I'm jumping the gun and sharing this in August. I don't have a photo step-by-step, but I will do my best to share with you how I made it so that you can replicate it if you want. Please let me know if my instructions need any clarity.
Next I bought the peacock feathers, large teal feathers, and elastic sequin material at Hobby Lobby (craft store). The sequin elastic was used for the headband as well as to hold the feather part onto her waist and legs so it stayed up properly. I bought a shiny teal blue polyester type material at JoAnn's (I think). I was lucky that the onesie matched the fabric color so well.
I'd recommend gluing or sewing some feathers onto the headband—it would have looked better.
I figured it would be easier to explain visually, so I drew up a really simple diagram for the rest. The peacock feathers were really long, so I was able to cut them almost in half and use the bottom part inside of the fabric "petals" as support. Better than wire because it's lighter and less risky for the kiddo. A lot of the costume I assembled with a glue gun, because it was only going to be used once or twice, so I figured it didn't need to be too heavy duty on the durability, but you could sew more if you like. The elastic bands I sewed into loops—I figured glue wouldn't hold those very well.
UPDATE: I've been spending so much time sending out emails with the diagram that I can't keep up. So I've got it listed in my Etsy shop, but it's only $3. It's an automatic PDF download so you will have right away. Here is the {LINK} to my shop. Thank you!
So first the easy part. The orange tights I got at Gymboree in October (they were sold as a Halloween item, so you might have better luck finding them then) and the onesie I got from Old Navy. Much easier than making those things. And useable afterward too. Another great resource for colored tights is welovecolors.com.
I'd recommend gluing or sewing some feathers onto the headband—it would have looked better.
UPDATE: I've been spending so much time sending out emails with the diagram that I can't keep up. So I've got it listed in my Etsy shop, but it's only $3. It's an automatic PDF download so you will have right away. Here is the {LINK} to my shop. Thank you!
Good luck and happy Halloweening a few months in advance!
Pin It
Sunday, June 19, 2011
Father & Son Tie Shirts
One last little Father's Day item. I appliqued this shirt & onesie for Ryan and the new little guy, full well knowing Ryan will never wear it, but I just couldn't help myself. At least the baby will wear his.
Happy Father's Day! Pin It
Saturday, June 18, 2011
World's Best Pop
Here's a little glimpse of what the father in our house will be getting on Sunday. A collection of "Pop" items! Soda Pop (IBC Rootbeer), Popcorn, Pop-tarts, and a Blow Pop lollipop.
Wrap it all up and throw a ribbon on it, and there you go. A sweet little treat for your special Pop.
(To make the label, take a 1" x 12" strip of scrapbooking paper and fold it in small accordian folds. Glue the 2 ends together with a hot glue gun. The center part is just printed on a color printer and punched out with a scallop circle craft punch. Flatten your accordian folded paper into a circle and hot glue the scallop circle label onto the center. Then just glue it onto a cute ribbon and drape it over your bag of goodies.) Pin It
Wrap it all up and throw a ribbon on it, and there you go. A sweet little treat for your special Pop.
(To make the label, take a 1" x 12" strip of scrapbooking paper and fold it in small accordian folds. Glue the 2 ends together with a hot glue gun. The center part is just printed on a color printer and punched out with a scallop circle craft punch. Flatten your accordian folded paper into a circle and hot glue the scallop circle label onto the center. Then just glue it onto a cute ribbon and drape it over your bag of goodies.) Pin It
Thursday, June 16, 2011
More Father's Day Goodness
More fun Father's Day ideas! And these come with a free downloadable template. Don't you love that? So nice of people to share. From the Lifestyle Crafts Blog.

via Armelle blog Pin It
Monday, June 13, 2011
Bow Ties
Still looking for Father's Day ideas? I am. And Twig and Thistle has some fun images and links that are all about the bow tie trend. It could be a fun theme for Daddy's big day. Head on over there for the complete gathering of ideas.
Pin It
Pin It
Thursday, June 2, 2011
Father's Day Crafting
With how long it takes me to get things done sometimes, I have to start thinking early. Martha is always a reliable source for fun ideas, and this Father's Day she and her team have done it again. Here are a few ideas I think would be fun.
And from Schlosser Designs, necktie and bow tie cards:
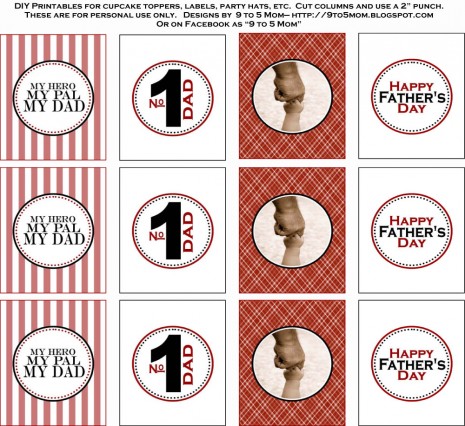
Free Printables from 9 to 5 Mom:
Happy Father's Day crafting!
Pin It
Free Printables from 9 to 5 Mom:
Cupcake toppers and necktie banner.
Sew a tie with Purl Bee:Happy Father's Day crafting!
Labels:
Father's Day,
holiday,
paper craft,
sewing
Wednesday, April 20, 2011
Papier Mache Easter Eggs
Friday, April 15, 2011
Origami Easter Bunnies
Monday, March 14, 2011
Easter Crafting: Marshmallow Bunny Plushies
My hubby is a big fan of Peeps, so I might just have to make one of these for him for Easter. They are so cute I want to make one for everyone I know. (And there's a full tutorial!) Thanks for sharing, Dandelions & Lace!
I found this over at Ucreate. Pin It
Monday, February 14, 2011
My Paper Heart
I recently shared these awesome framed hearts from Sarah & Bendrix. Since there wasn't time for me to order one before Valentines Day, I decided to make one of my own to give to my hubby. I didn't go back and look at theirs, I just loosely had the image in my mind and made my own version of it.
If you want details on how I did it, keep reading.
I used a frame from IKEA and used some strips of corrugated cardboard under the mat to give it enough room for the dimension needed by the folded paper hearts. A simpler solution would be to just buy a shadow box frame, but apparently I can't do anything the easy way.
I gridded out my paper into equal size squares (and apparently I can't count, I should have had another row or two!) Then I cut out anything red from my magazines (strawberries, bike jerseys, shoes, swimsuits, etc.) and used spray glue to back them on another sheet of paper for more sturdiness. I used my mini heart punch to punch out the hearts, and scored each of them down the center. I folded them to give dimension. I put a dot of plain old Elmer's glue in the center of each of my grid squares and carefully placed each heart using needle-nose pliers and an Exacto knife. I felt like an entomologist (bug scientist). Let dry and erase grid lines. Then I wrote in my love note and put in in the frame. Total time commitment: about 2 hours. And he loved it.
If you want details on how I did it, keep reading.
I used a frame from IKEA and used some strips of corrugated cardboard under the mat to give it enough room for the dimension needed by the folded paper hearts. A simpler solution would be to just buy a shadow box frame, but apparently I can't do anything the easy way.
I gridded out my paper into equal size squares (and apparently I can't count, I should have had another row or two!) Then I cut out anything red from my magazines (strawberries, bike jerseys, shoes, swimsuits, etc.) and used spray glue to back them on another sheet of paper for more sturdiness. I used my mini heart punch to punch out the hearts, and scored each of them down the center. I folded them to give dimension. I put a dot of plain old Elmer's glue in the center of each of my grid squares and carefully placed each heart using needle-nose pliers and an Exacto knife. I felt like an entomologist (bug scientist). Let dry and erase grid lines. Then I wrote in my love note and put in in the frame. Total time commitment: about 2 hours. And he loved it.
(grid lines)
p.s. I have to say, this day is a lot more fun when I'm planning special things for someone else.
Pin It
Valentine Goodies
I found this cute idea on Super Ziper, and thought I'd give it a try. My crazy husband likes milk chocolate better than dark chocolate, so that is what I used. Chocolate dipped pretzel sticks with candy hearts on top.
The pretzels are not quite flat on the end so the candy hearts kept sliding off, so I actually sawed off the tips. Yes, I sawed off the tip of each and every pretzel with a serrated knife so they would be flat. Then dipped in melted chocolate, and stuck the candy heart on the end. Since I didn't have any styrofoam without raw meat on it, I improvised and used a loaf of rosemary bread that I was about to throw out (because it was getting old). I just stuck those dipped pretzels right in for drying. Hopefully they won't taste like rosemary. Hopefully my hubby will think they are as sweet as I do.
I made these a couple of days in advance, so the salt is starting to spot through the chocolate. So a little tip for you would be don't make them in advance if you want them to look perfect. Also, don't use a loaf of bread to stick them in. If you leave them there for a few hours, the ends start to get soggy. But they do crispen up again once removed. That's another lesson I learned.
You can find the jumbo candy heart sprinkles on Amazon or Etsy, or probably a number of other places too. Pin It
The pretzels are not quite flat on the end so the candy hearts kept sliding off, so I actually sawed off the tips. Yes, I sawed off the tip of each and every pretzel with a serrated knife so they would be flat. Then dipped in melted chocolate, and stuck the candy heart on the end. Since I didn't have any styrofoam without raw meat on it, I improvised and used a loaf of rosemary bread that I was about to throw out (because it was getting old). I just stuck those dipped pretzels right in for drying. Hopefully they won't taste like rosemary. Hopefully my hubby will think they are as sweet as I do.
I made these a couple of days in advance, so the salt is starting to spot through the chocolate. So a little tip for you would be don't make them in advance if you want them to look perfect. Also, don't use a loaf of bread to stick them in. If you leave them there for a few hours, the ends start to get soggy. But they do crispen up again once removed. That's another lesson I learned.
You can find the jumbo candy heart sprinkles on Amazon or Etsy, or probably a number of other places too. Pin It
Saturday, February 12, 2011
Valentine Sneak Peak
I ordered this Valentine for my hubby for V Day. If you know him, you know nothing could be more fitting. He has a nickname of "mantis the man" which comes from an inside joke, from high school I believe. Big thanks to designers Nathan and Matthew for making more and shipping so quickly. If you want one too, you can find it in their Etsy shop here. Pin It
Thursday, February 3, 2011
Valentine Inspiration
Check out all these cute Valentines items from Sarah & Bendrix. How fun would it be to share one of these with your sweetie this year?
I see a new DIY project in my future! My little heart punch is going to come in really handy. Pin It
Thursday, December 23, 2010
Christmas Wreath Make-over
My last house had a huge knotty alder stained door for the front door. And I had a cranberry wreath that looked just lovely on it. But since we moved and painted this door red-orange, the cranberries clashed. So I gave the wreath a little make-over with some silver spray paint. (Sorry I have no before photos). I much prefer the silver to the cranberry colored wreath!
I ran out of spray paint, so you can see little bits of cranberry showing through if you look closely. But I'll finish 'er off before she gets packed away for the season, don't you worry.
Merry Christmas everyone! Pin It
Wednesday, December 22, 2010
DIY T-shirt Wreath
I think I'm going to have to make one of these for next year. Merry Christmas!
Head over to Cathie Filian to find the tutorial. Pin It
Monday, December 20, 2010
Pom-Pom Stocking
Just in the nick of time, here's a stocking I made actually like 3 weeks ago. Not your traditional color scheme, but I think it could be fun to work around. I'd like to embroider a name on it, in red thread, to really finish the look. (But I don't embroider.)
The top fabric is a grey linen, the stocking fabric is a home decor-weight fabric that feels a little tapestry-esque. And of course, yellow pom-pom trim! Pin It
Subscribe to:
Posts (Atom)