Saturday, May 28, 2011

The Double Needle

Have you ever sewn with a double needle? I haven't. But here's good news for people like us.


Over at Make It and Love It you can read about some basic stitches and how to use a double needle. I figured it couldn't be too hard, but I also didn't want to risk messing up my machine. Turns out it's a simple as can be. I can't wait to try a double needle now. I'll be looking for an excuse to use one!

Here's the link to her post.

Since I have no real official education when it comes to sewing, there is a lot I don't know. I never took a Home Economics class in school or anything. What I do know I learned from my mother, who was kind of tired of sewing by the time I was ready to learn. Not to mention she was juggling 6 kids. So when I find a nice little post like this, I find it helpful. Thanks for sharing, Ashley! Pin It

Tuesday, May 24, 2011

Not Too Shabby Knock-off

I recently saw this dress at Shabby Apple, and loved it. The price, however, I did not love. Especially for the quality. I think if you are going to pay that much for a little kid dress, the quality had better be pretty good.

And then today I saw this great tutorial and pattern by Kelly on how to make your very own. And it looks pretty simple!
Thanks for sharing, Kelly!
Pin It

Wednesday, May 18, 2011

Nursery Designer

I'm in love. I've just discovered the Nursery Designer website by Carousel Designs, and it's amazing and so fun to play with.

They have tons of fabrics to chose from, and you just drag and drop them onto the part of the bedding you want in that fabric. They'll even show you just the matching fabrics if you want. And you can change the wall color (Benjamin Moore paints—real colors!) and trim colors, change the flooring (so it looks like your room), change the crib color, and so forth. And then you can have them make the bedding for you! What a magical place.

Pin It

Friday, May 13, 2011

DIY Fringe Chandelier

I'm too scared to attempt any lighting project that includes an electrical wire, or removing my current light cover, because I think I might burn my house down. But here's something I can make for Ava's new room that I could just mount right around the existing flush-mount light fixture. I'm loving this idea!
You can find the full instructions at The Sweetest Occasion, but I'll give you a quick summary.
Buy 2 embroidery hoops, paint them, tie them together with fishing line, use a hot glue gun to glue fringe trim (4 yards) to hoops (wrapping around twice), hang up and admire. Easy peasy, right? I can't wait to try it.

These would also be fun for party decor. Pin It

Wednesday, May 11, 2011

More Bathroom Goodness

I'm a fan of framed bathroom mirrors. Where I live, in houses that I can afford, builders tend to just put in plain borderless mirrors in every bathroom. So framing the mirrors is something I've wanted to learn how to do. Of course I could pay someone else five times as much to do it for me, but why do that when I know is totally do-able myself? (Or at least do-able for my hubby, if I can convince him to do it).
I found a great tutorial at Show & Tell on custom framing your bathroom mirrors. Basically, you take some crown molding and/or baseboard trim, measure it, miter cut it, paint the back, and glue it on with liquid nail. Then fill in the gaps with dry-dex and caulk, paint it, and you're done! But there's a more thorough explanation and details over at Show & Tell.
I won't be able to get to this project myself for a little while still, but I can hardly wait to give it a try. It looks pretty simple, and the results are so great!
Pin It

Sunday, May 8, 2011

Bathroom Makeover: The Reveal

Enough delay. Forget the rug. Here's the bathroom!
BEFORE:

AFTER:
The cat seems to like it...
I ended up spray painting the mirror (Craigs List, $30), but in retrospect I think I should have used a brush. I may still do that, so I can get a color that matches the towel better. Because of all the grooves and ornateness of the mirror, I think a brush would work fine on it and not leave those despised brush strokes visible.
The hand towels are these:
The toilet corner...
I saw a bike print almost like this at Etsy, but it was the wrong size and slightly wrong colors for what I wanted. So I recreated it, and I hope that's okay. I won't be selling it or anything. Painted this $2 gilded frame white to match the trim and cabinets. For that I did use a brush and it came out great.
And since everyone likes to read in the bathroom, why not have a magazine rack? Is that shameful or just practical? I like to think it's practical. Or at least realistic.
Extra info:
Painting the cabinets turned out to be quite a pain. I think I didn't sand them sufficiently. So when I did the first door with a nice brush, and still saw too much brush strokage and uneven coverage, I had to sand them down again. I opted to use an electrical sander this time, and the paint all started beading up in a few places and creating edges and it was just a mess. 
But I finally prevailed and got the whole thing painted using a small foam roller. That required a lot of coats of paint, but looks so much smoother and professionally finished. For me, definitely the way to go.

Taping the walls (and then retaping for the second color) took some time, but it was worth it. And I didn't have to do very much touch up. I did use a level, if you are wondering.
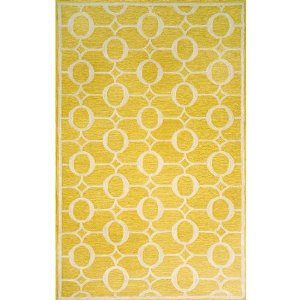
I think I will probably go with this rug from Garnet Hill, and be done with it all! Hopefully it actually looks like the internet photo.
Can you imagine if I ever tried to makeover my kitchen, or something big? It might take me 10 years. The boy nursery (crib bedding is almost done) and the girl toddler room (not even started) are next though... so wish me luck! I've only got about 2 months to finish both of those! Yeah, yeah, I know some of you could do them both in a week. I wish I could! Pin It

Friday, May 6, 2011

The Rug Issue

My long-awaited bathroom rug finally arrived. Problem is, it doesn't look like this (the online photo):

It looks like this:
It doesn't even really look yellow. It just looks like a dirty rug in need of a washing. Gahh, internet ordering!
So now what? First, I have to make sure I can return it. It didn't come with clear information on that.
I'm trying to decide if I should order something like this white and yellow rug from Garnett Hill...
But will that white show so much dirt? I suppose I could just wash it weekly (it is right across from the laundry room after all), or should I go with just a solid yellow rug? Or maybe I should try a DIY rug—I've been seeing a lot of those around. I'm a little skeptical of how they turn out in real life though, so I'm not sure I dare. Have any of you tried doing a painted rug? Pin It

Wednesday, May 4, 2011

Oh, Wouldn't It Be Lovely?

Today I spotted these lovely framed decorations over at Curbly. And I have to agree, the DIY light bulb in me totally went off. It would be so fun to recreate these. Even more fun than buying them (for $65 a pop). They are lovely by themselves...
 Or with objects!


If she wasn't on the other side of the country, I'd give them to my mom, whose house has been referred to before as "the white house". She likes things light and airy, which I suppose is right on trend these days. They would be fun in an entryway. Or at least in my entryway. Pin It

Monday, May 2, 2011

Ruffle Baby Shoes (Tutorial)

Remember this striped ruffle skirt I made a while back?

Well take a look at these shoes! They are a perfect match--exact same material (and style!) And much better photos. And you can make your own darling baby ruffle shoes in any color, because there is a free tutorial! Head on over to Fleeting Thing for the instructions.
via UCreate Pin It